


Week #2 Aperture
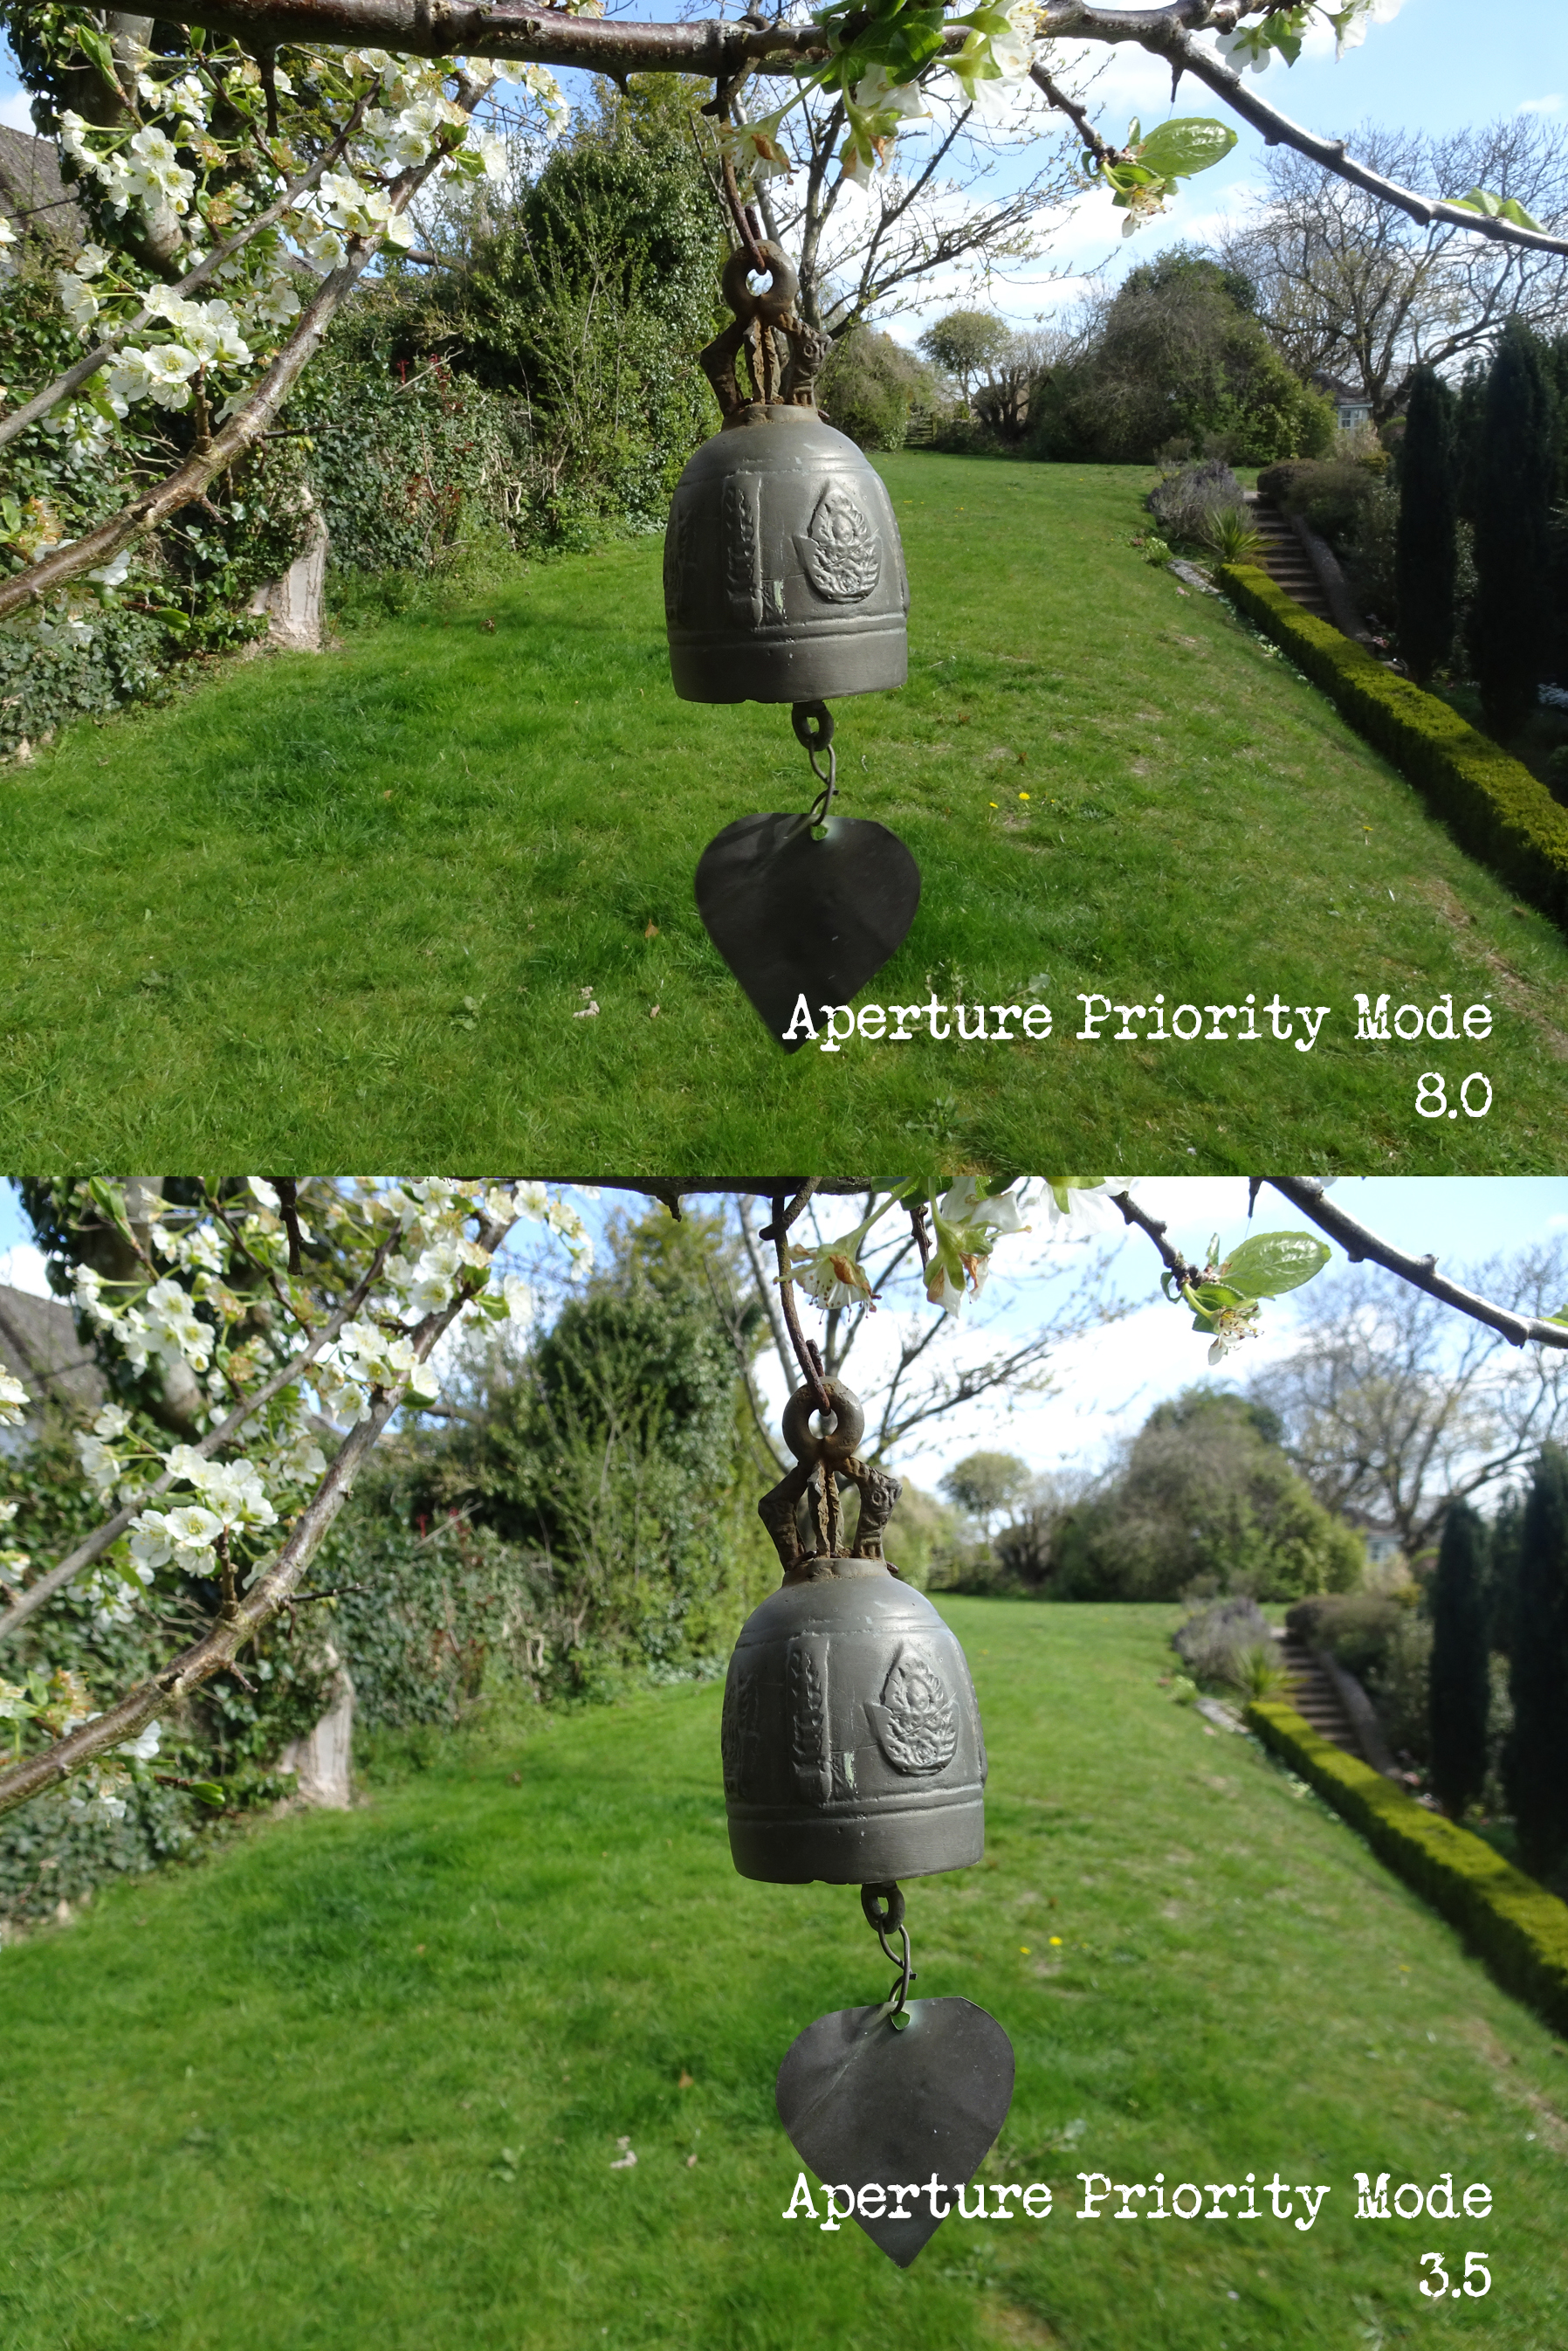
This week was all about making the first move off the automatic setting, investigating the Aperture Priority controls. My little camera doesn’t have quite the same Aperture range as those given as examples in the lesson, but I went with the flow and did what I could.

In each case, I used the highest aperture setting for the first photograph - 8 - and the lowest setting for the second - 3.5 Clearly, the depth of field is more in focus with the 8 setting and rather fuzzy in the 3.5 variant, but this effect wasn’t anything like as pronounced as in the class examples.
The difference here is hardly noticeable.

In this third sample, there’s hardly any difference at all. Perhaps I’ll have another go in a different situation, but for now, I know more about aperture control than I did and it’s something I would consider at those times when I’d like to achieve this background effect.
Checklist for Chapter 2
▢ I can put my camera on Aperture Priority mode
▢ I can change my apertures
▢ I know what the smallest and largest apertures are for each of my lenses
▢ I know that aperture is one of the 3 ways that my camera controls the amount of light coming in through the lens and hitting the sensor
▢ I know that the aperture is found in the lens, not in the camera
▢ I know that f4 is a large aperture and that f16 is a small aperture
▢ I know that the depth of field is the section of an image which is acceptably sharp
▢ I know that f4 will give a small depth of field and that f16 will give a large depth of field
▢ I can take a photo of a subject with the background blurred:
