


I love my machines
With one exception, perhaps, because printers are the devil’s work!

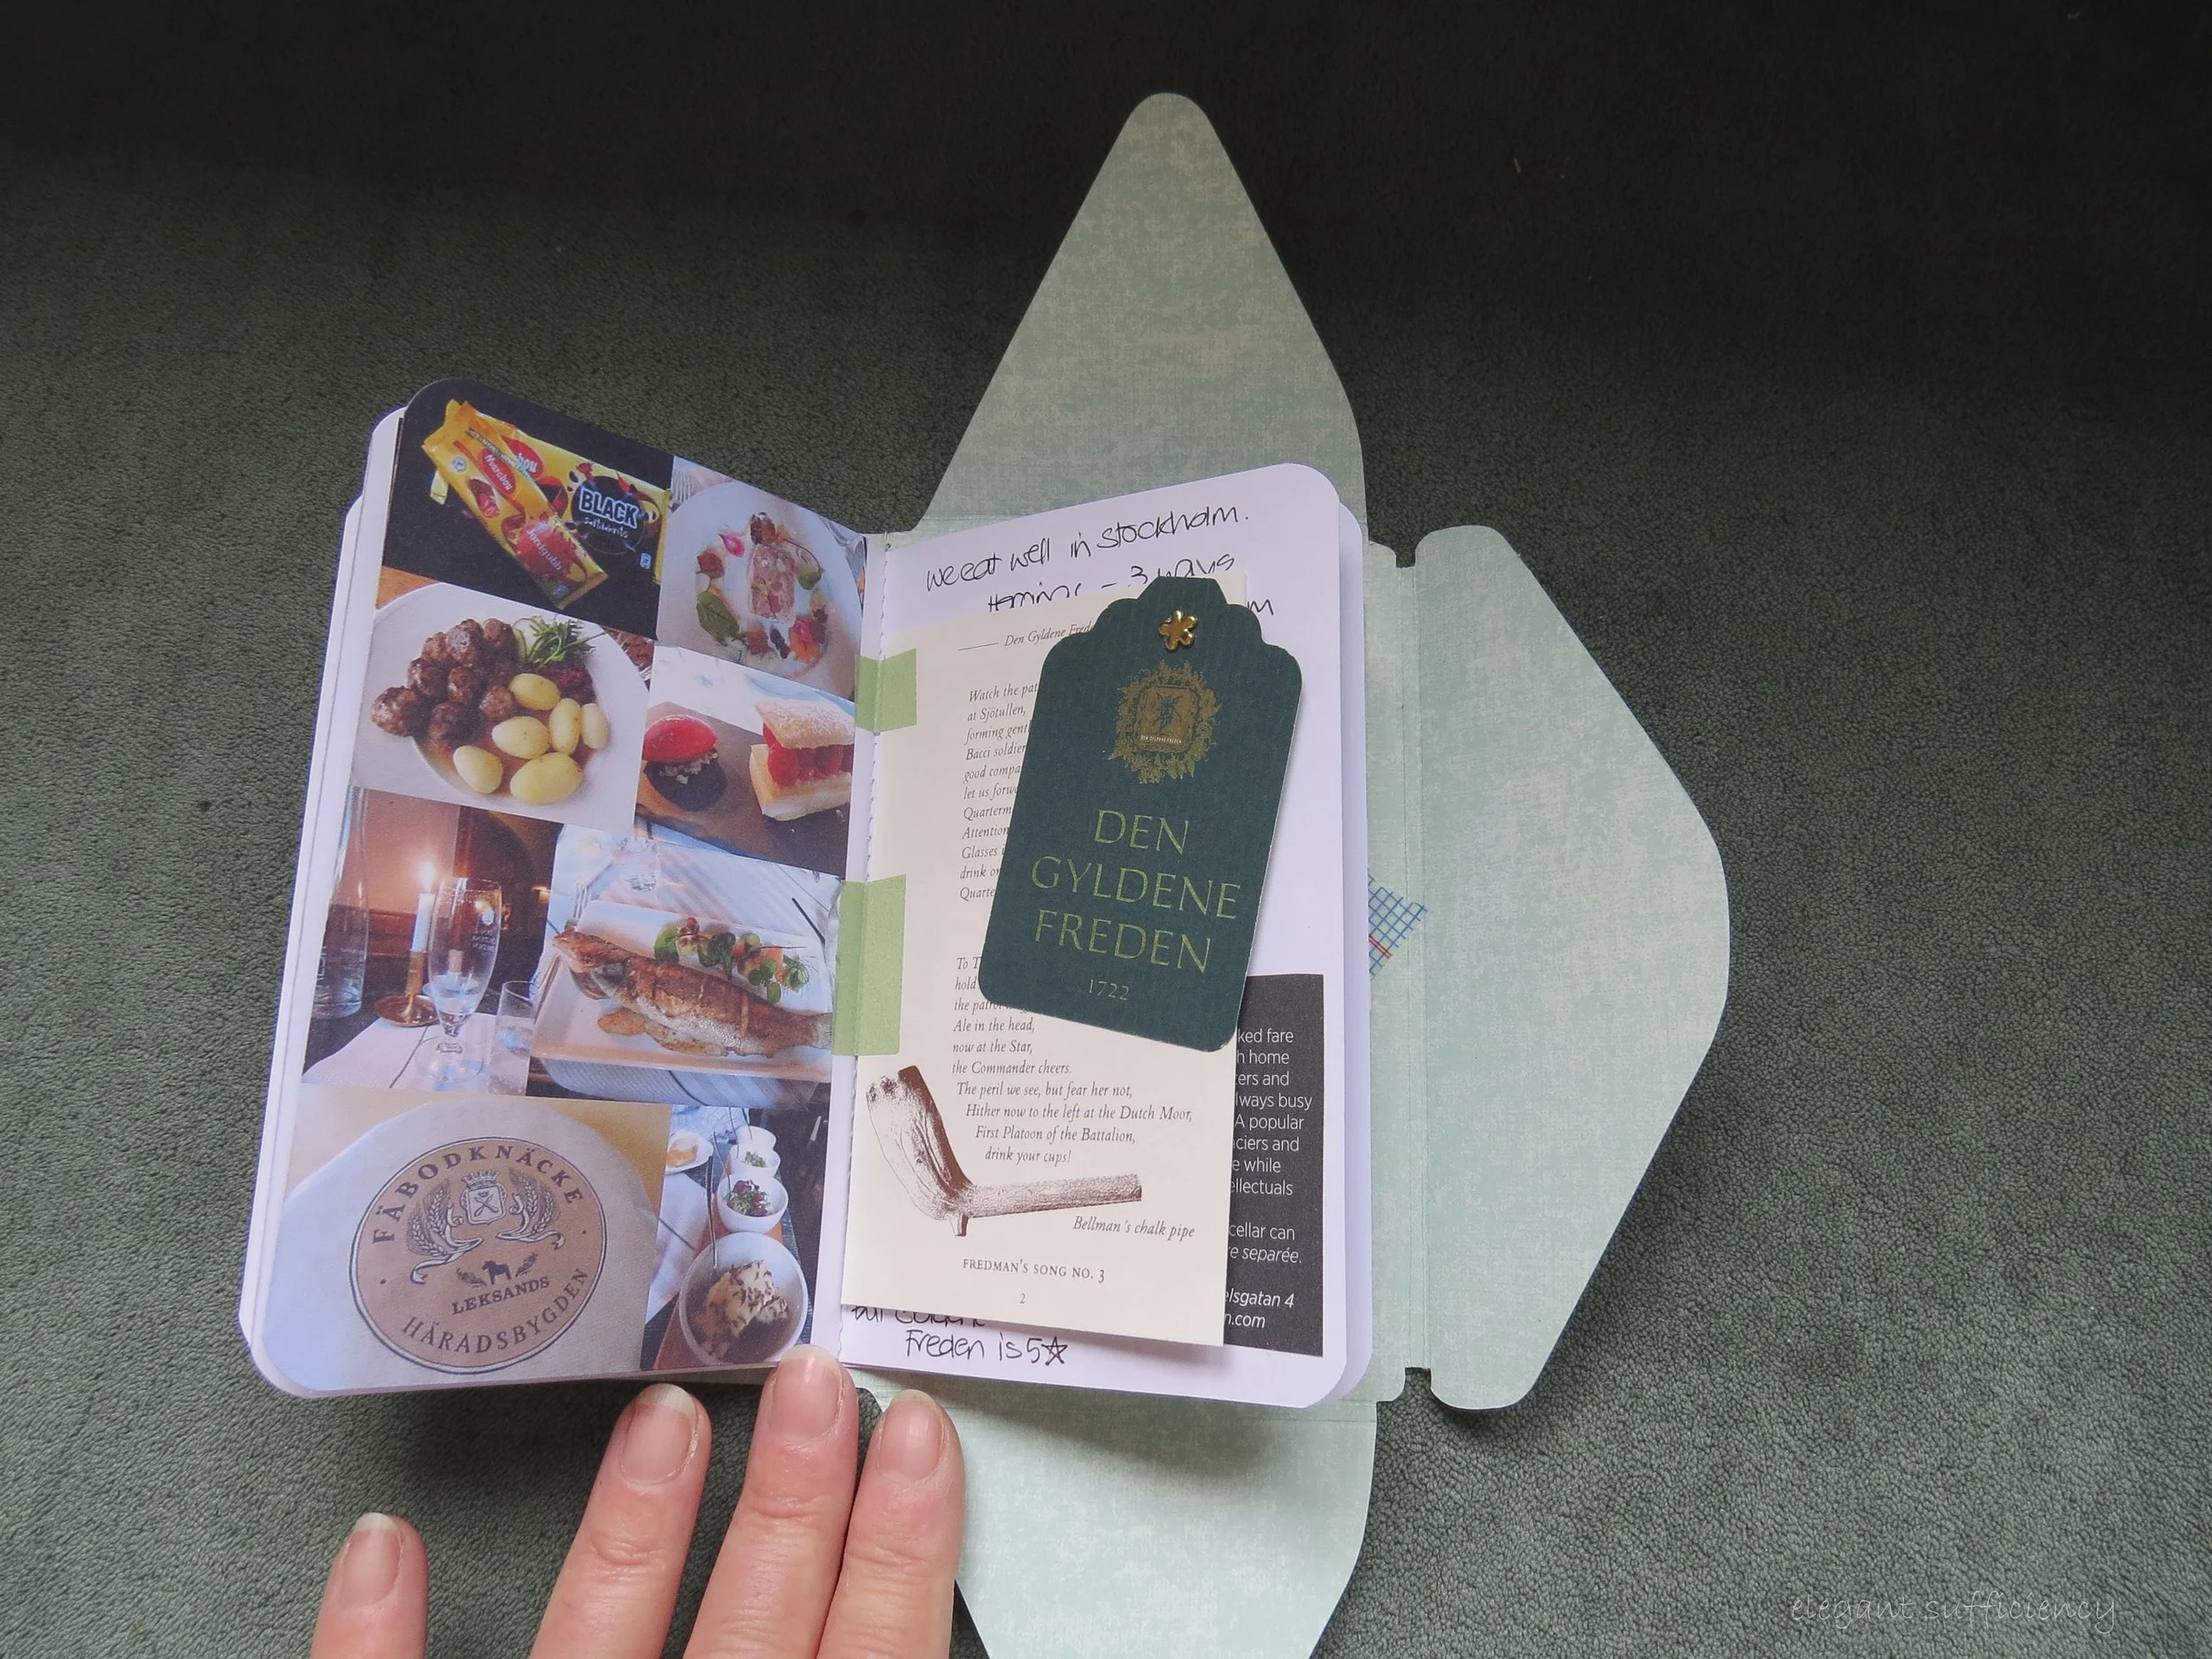
Do you remember this? I’d made a knock-off of a Moleskine Message following a few days in Stockholm and yesterday, whilst mulling over how to capture a few memories from St Petersburg, I decided to do something similar.
Except I’d forgotten how I’d done it and my blog post was a little sketchy on the detail.
I looked closely at those cut edges and knew they hadn’t been cut by hand but using my Silhouette, for sure. If that was the case, that cut file must be on my computer somewhere then, but it was proving elusive. Where might I have saved that file? Not in my ‘Silhouette Cut Files” folder, sadly.
I resorted to the search programs and files facility, but was unsure what to search for. After a few no files of that name were found reports, I hit gold! There it was, <moleskine envelope book.studio> in my photo folder for May 2013. In no time at all, I’d cut out the cover and six pages. Love my Silhouette!
My next step was to create a few photo collages in Picasa. At this stage, I didn’t know how many, but simply found a few themes to work on and ended up with nine. I opened them in Photoshop and resized them all so they’d fit in the book.

It was about now I realised that printing them wasn’t going to be easy. I took another close look at the Stockholm book and knew I’d printed directly onto the pages and not simply glued in photo collage pages. Hmm. Now, how did I do that?

I created a file in Photoshop with the size of the double-page spread and placed a piece of double sided tape at one end. I set up a print file with the collage sheet in the right place, lightly adhered the cut page on the sheet of paper and fed the whole thing through the printer.
The first one worked fine. The second one didn’t. Never mind. Try again.
I managed to print three or four pages, doing my best to work out where each collage page would fit in the finished book (not easy!) sometimes needing to turn a page to get it in the right orientation.
And then I tried to print on the reverse of an already-printed sheet. The double sided tape pulled away part of the print. Better do that one again.
And then the printer began to add a stripe all on its own. It does things like that from time to time, just to annoy me, I think.
I decided it was time for tea and switched everything off and thought I’d had enough for one day.

I’m not quite sure how I achieved the next step and can only think it was the inspiration fairy who visited me in my sleep! When I went downstairs to my studio the following morning, the obvious answer to my challenge was staring me in the face.
Print and cut using my Silhouette!

In no time at all, I’d imported each page of photographs into the cut file I’d already designed and sent it to our pesky printer which purred and printed the pages perfectly. After printing, I fed the sheet of card through the Silhouette for cutting and, amazing machine that it is, achieved a perfectly accurate result.

I love it when everything comes together like that, when the seamless process works perfectly and I can get a great workflow going.

But it was time for the intermediate technology. A sharp pencil and ruler was the best way to measure and mark the centre fold of the little book. I clipped all the pages together and, before folding, I switched on my sewing machine and took a deep breath.

I threaded my machine with heavy thread, fitted a jeans needle and lowered the speed. Slowly, carefully, my lovely machine stitched a beautifully sewn spine. I wanted the needle to pierce the paper from the right side in, which meant I was working “blind”.

I hardly dare turn it over and look at where the line of stitching had worked out on the other side. (At this stage, I hadn’t quite noticed that I’d sewn the pages into the book cover the wrong way round!)

Look! (I couldn’t quite believe it how neat that sewing turned out)

I carefully scored the foldlines to complete the assembly of the book but as I did, I realised my mistake. Would it matter? I opened and closed it, flicked through and showed it to my hero, who agreed with me.
It mattered. It just didn’t “work” with the flap going the wrong way.

So I treated that one as a practice effort and started over again. I’d saved all the files and it took no time at all to print and cut them all out once more.

I stitched the spine more confidently, for after all, I’d had practice! When it came to that part though, I double checked it was the right way up, needless to say.

The book was soon finished and ready to have all the bits of ephemera stuck inside.

Yes, of course the Turkish Map Fold features!

Second time around went so much more quickly. Not only had I worked out the process, I’d managed to avoid the pitfalls too.
I thought I’d better write a few more details down in my blog this time as well, just so that when I next want to make a little book, I have something to refer to! After all, I’ve got to keep all those machines working. I even feel a little warmer about the printer, which worked perfectly with the Silhouette software, leaving me to wonder if it’s the Adobe Photoshop software which presents the problem.

But I’ll leave that one to my Hero. I know my limits